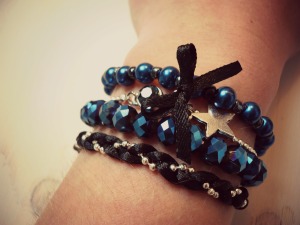
Make your own party armcandy with this step by step tutorial. With this bracelet it looks like you are wearing multiple bracelets but it’s actually just multiple different strands attached to one clasp so it’s easy to put on and take off.
You can reuse this design with so many different materials, beads and colours which gives you endless options. Let’s get to it then..
What do you need?
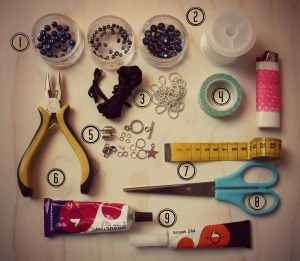
- Glaspearls 6mm, seed beads 4mm and facetted glasbeads 8x6mm
- Nylon thread
- Ribbon, satin cord or suede and ballchain
- Scotch and a lighter
- End caps, ballchain endcaps, connector, rhinestone 6mm, jumpring 4mm and 6mm, double loop ring 6mm, crimp beads, clasp and a small charm
- Pliers
- Tape-measure
- Scissors
- Hasulith jewelry glue and rhinestone glue
Step 1:
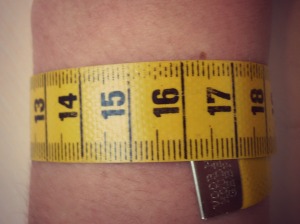
Measure the right size for your wrist, leave about 1.5cm for your clasp (depending on the size clasp you are using)
Step 2:
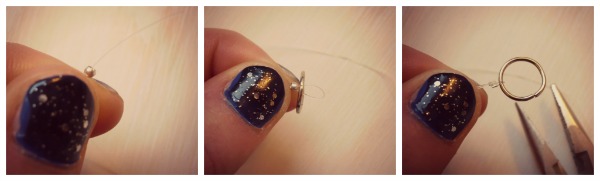
Cut about 30cm nylon thread and fix it to a jumpring using a crimp bead. (put your thread through the crimp bead, make a loop around the ring and put your thread back through your crimpbead, use pliers on the crimpbead and make sure the thread is secure)
Step 3:
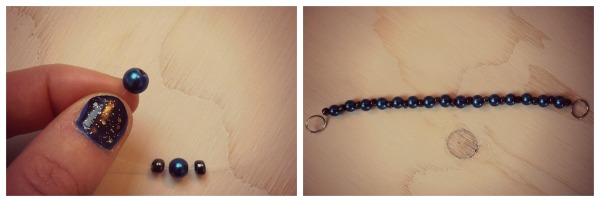
String your beads on the nylon thread, we used a combination of pearls and seed beads. String untill your bracelet is long enough (that is your wrist size minus the space you need for the clasp and jumprings)
Step 4:
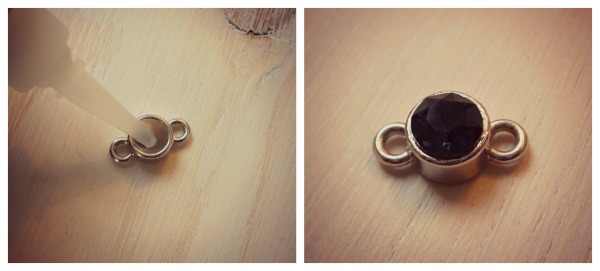
Glue your point ston into the connector with the hasulith rhinestone glue. Leave to dry for at least an hour.
Step 5:
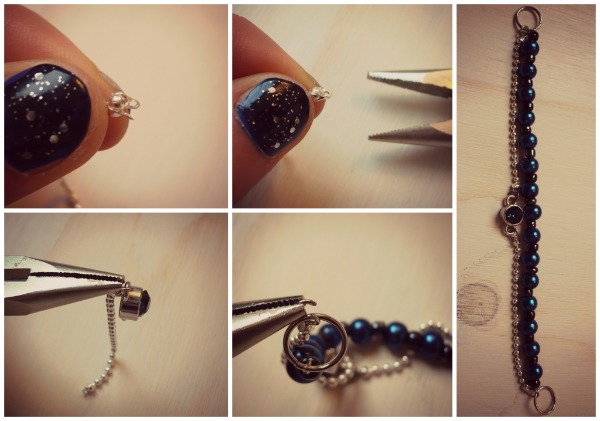
Your second strand is made of ballchain and the connector. Cut two pieces of ballchain to size and use pliers to put ballchain endcaps on both ends of the ballchain. Use 4mm jumprings to connect the ballchain to the connector and the ballchain to the jumpring.
Step 6:

Cut another piece of nylon thread and string some faceted glass beads. Again fix it to the jumpring using crimp beads.
Step 7:

Cut two pieces of satin ribbon and one pieces of ballchain of about 30cm. You can use a lighter on the ends of the ribbon so it doesn’t fray.
Use a piece of scoth to keep everything together and make a braid that is the same as your other bracelet strings.
Step 8:
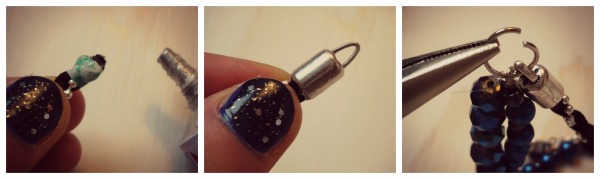
Use the jewelry glue to glue your braid in endcaps, again let dry for at least an hour. Open the jumpring a little bit with your pliers and slide the endcap on like you can see in the photo above.
Step 9:
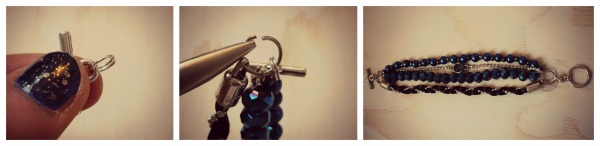
Fix a double loop ring to one side of your clasp. Open the jumpring and slide the double loop ring on. Repeat on the other side with the other half of your clasp.
Tip:
You can put some clear nail polish or jewelry glue on the opening of your jumpring to make it more secure.
Step 10

For the finishing touch we are going to add a cute ribbon and star charm.
Fix a 6mm jumpring to your charm and stick it to your table with a pieces of scotch. Put a piece of ribbon through the jumpring an make a cute bow tie. Take a 4mm jumpring to fix this to your connector.
And that’s your party armcandy ready!
What do you think?
Are you going to try and make this design?
What do you think of the ribbon tie? Would u use it for this design or maybe some other pieces of jewelry?
We are always happy to hear your thoughts and suggestions, feel free to comment below.
p.s. Have you made this design? If you like you can share it on instagram with #beadsandbasics and show the world 😉