Lately you’ve been seeing them around a lot: owls made of macramé. Here we learn quickly and easily how to make such a beautiful macramé owl yourself! Macramé is relatively easy, but this pattern may be a little tricky for the real first-timer. So are you super keen to get started with this one? But is this one of your first times macramé’ing? Check out our blog with macramé basic knots, become a macramé pro in no time and then get to work with this beautiful Macramé Owl 😉 .
You can choose what thickness of yarn you use – thicker simply results in a bigger owl, thinner in a smaller one out 😉
Choose a color that suits your interior and voila, before you know it you have such a beautiful homemade Macramé Owl in your home.
How to make a Hip Macramé Owl

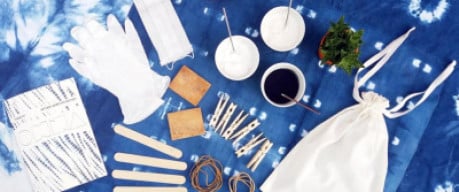
Supplies:
– Macramé yarn (I used Durable Macramé White. You could also use another color)
– Scissors for the eyes and beak
– Wooden Beads for the eyes and beak
– Optional twig
How to make a Beautiful & Trendy Macramé Owl – Step by Step Description
To start, you cut 12 wires of 2.5 meters, 12 wires of 25 cm that you put in a pile, 1 wire of 2.5 meters that you also put on that pile of 25 cm and another 1 wire of 1 meter.

Fold the 12 threads of 2.5 in half and knot them with the larks head knot in the middle of the stack of threads of 25 cm + 1 of 2.5 meters.

Put 4 threads aside and start making the first square knot with the 4 threads you see in the picture.

Repeat with adjacent threads until you have 4 square knots.

Put the outer two threads aside and make a square knot with the first 4 threads.

Repeat until you have 3 square knots.

Again, put the 2 outer threads aside and tie a square knot with the first 4 threads.

Make another square knot with the next 4, so you have 2 square knots. Take the middle 4 threads and make 1 square knot with them.

You then knotted a triangle.

Take the end of the one long thread in the stack of threads you knotted 12 threads to and lay it diagonally across the work as shown. You are now making a series of double half hitch knots.

Make double half hitch knots to half and repeat on the other side.


Repeat another row below using the outer threads as diagonal threads.

Repeat one more row underneath, keeping 6 threads free on each side.

Make the beak in the middle and knot it with a square knot underneath and thread the eyes on the 7th and 8th threads from the outside.

Grab the outer 3 threads.

And make a normal braid. The braid should be about so long that it is flush with the bottom of the square knot you made for the beak. That’s about 6 or 7 pieces.

Lay the outer thread of the braid diagonally across the owl. And make the first double half hitch knot with the thread that I am holding with my finger in the photo. Then continue laying double half hitch knots all the way to the center.

Make double half hitch knots to the center, placing these tightly against the eyes as well so that they are nice and secure. Repeat this same process on the other side.

Tie the center still with a double half hitch knot.

Now grab the outer 3 threads again.

And make a vertical larks head knot: the outer thread over the two inner ones, pull under and through the loop, pull.

Then the outer thread under the two inner ones, pull over it through and through the loop, pull.


Repeat, but now leave about 0.5/1 cm between the first and second knot.

Slide the knot upward to create a loop.

Repeat until you have 8 of these loops and repeat the same on the other side.

Work inwards in the same way, always working with three threads and making 2 loops less each time inwards. So the rhythm is from outside to inside: 8 – 6 – 4 – 2.

This is what it will look like. Repeat on the other side as well.

Now take the middle 4 threads and make a square knot in them.

Now make the next square knot to the left side with the outer 2 threads of the first square knot + the two adjacent threads. Repeat this way working outwards (you will keep 2 empty threads on the outside).

This will be your result.

Now cross the middle 2 threads as you see in the picture, right over left.

And make a series of double half hitch knots (total of 9) keeping 5 threads free on the outside.

Take the innermost thread from the left side and lay it diagonally across the right side and make another series of double half hitch knots.

Again, keep 5 threads on the outside.

Take the middle thread and the left adjacent one.

Place the leftmost thread over the middle thread and make 1 double half hitch knot.

Do the same for the other side: middle + adjacent right, right thread over middle and 2 half hitch knots.

Now take the adjacent left thread, lay diagonally and make 2 half hitch knots.

Same for the other side, 3 half hitch knots.

This will be your result.

Starting from the 6th thread, take 4 threads (so from the outside thread 7, 8, 9 and 10) and put 6 square knots in here.

When doing this, do leave a little space between the first square bun and the rest of the owl.

Thread the middle two threads through the open space and pull. The square knots now roll up to form the owl’s legs.

Put another half square knot to fix the rolled leg and of course repeat on the other side too 😉 .

This is the result. Through the legs you can optionally stick a branch but that is not necessary.
The bottom threads are knotted together with a gathering knot (because it is very difficult to take pictures of it, here is a link with an explanation of the gathering knot). And cut to the length you want.
The pieces of thread above the head of the owl you cut to the desired length (about 5 to 6 inches) and comb out.

And this is the result 😀 😀 😀 Super cute or not!

Use the owl as a decoration indoors, outdoors or in the nursery 🙂
Be sure to check out our previously posted Macramé Blogs:
– Decorate your terrace with a Macramé flagline
– Go for the Ibiza Boho Style with these beautiful Macramé feathers
– Go shopping with your own Macramé bag

Check out many more creative macramé patterns here!

And get inspired on Pinterest by other macramé projects like these beautiful Macramé Angel Wings.
Of course, you can find 1001 variations on the owl alone, and of course you can always get started with your own design.
Whatever you do, we are as always very curious about your ideas, wishes and results. So share them with us, via email, below in the comments or on instagram with #beadsandbasics. We are looking forward to it 😉 again.
Lots of making fun!!!
Love,
Matilde