
A woman can never have enough bags. And especially now that you often don’t get plastic bags anymore in stores in the Netherlands. That’s why we made this DIY Macramé bag. A trendy must-have bag that is super easy to make.
The best thing about this DIY Macramé bag is the fact that it is super easy to adjust it in size! Even for beginners this bag should be a piece of cake. Especially when you first check our blog with macramé basic knots. Here you will learn in a few easy steps the most used macramé knots and you will become a macramé pro in no time!
DIY Macramé Bag, Hip Musthave Item & Easy to Make!

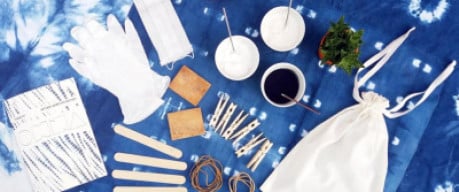
Supplies:
– Macramé yarn (I used Phildar Phil Corde Ecru, but you can also use other yarns)
– Scissors
DIY Macramé Bag – Step by Step Description
I made handles for these myself by braiding yarn first, but you can also use nice ribbon for example and glue it together as a handle.
In any case I used 2 braids of 6 threads of 1,5 meter. You tie these together at the ends and use them as handles. Do you think these handles are too long? Tie them so they are shorter and cut the ends off.
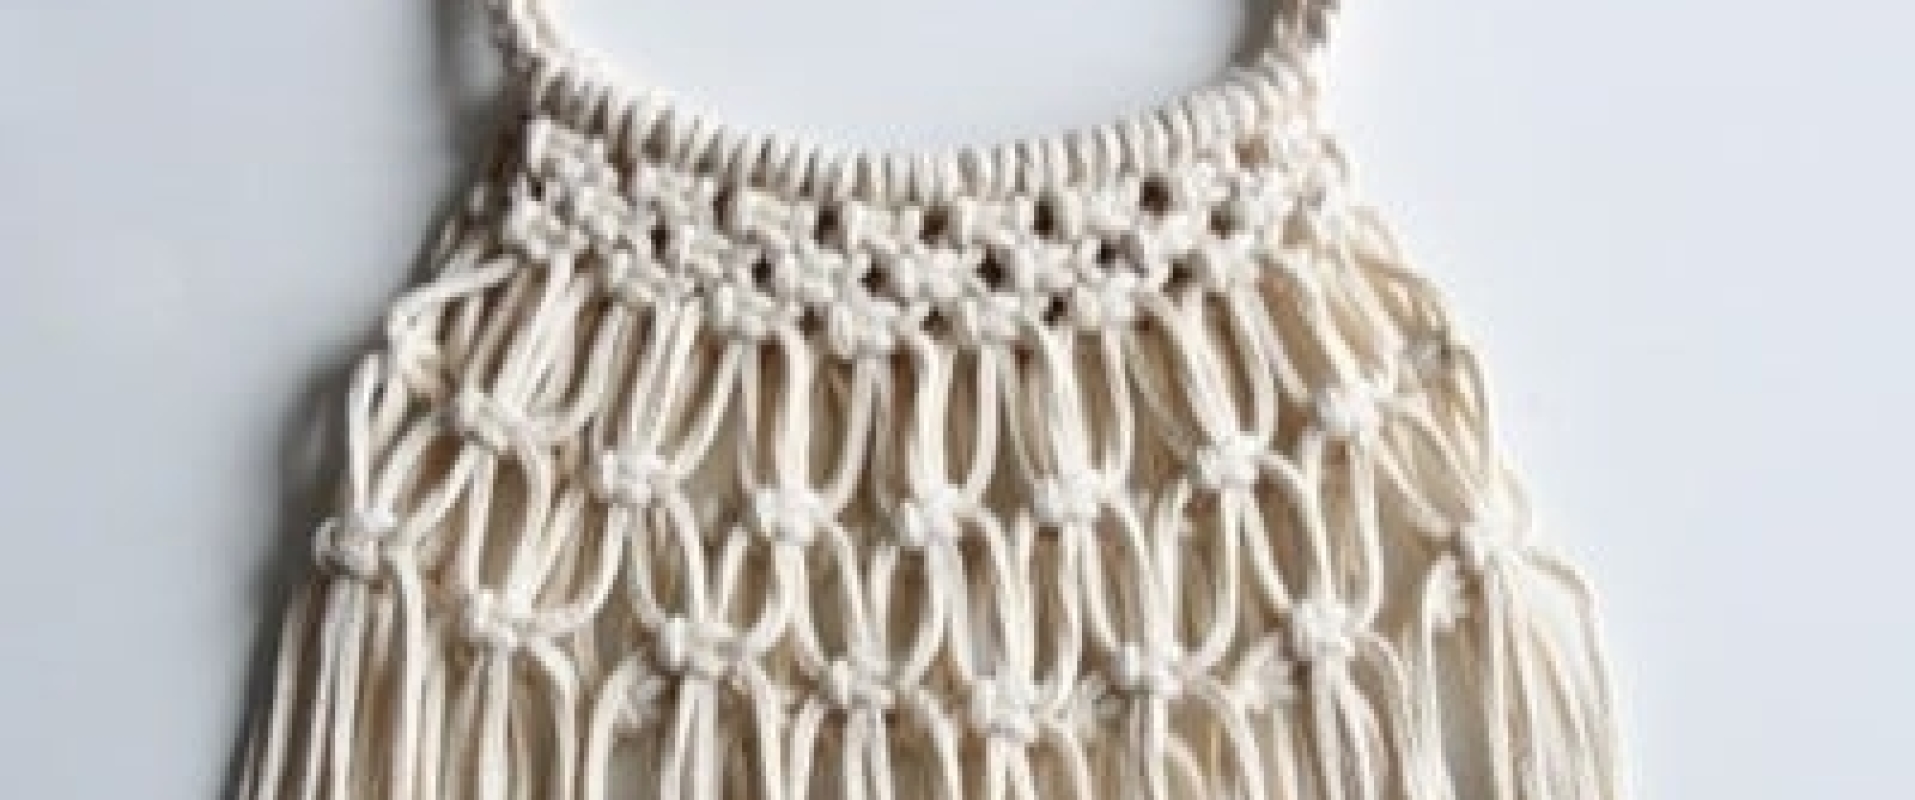
For the bag you cut 32 threads of 2 meters long.

Attach 16 strands with the larks head knot to one handle, the other 16 to the other.

Make 8 square knots. Here you see the result of 1 handle, the same process you repeat for the other handle.

Make 7 staggered square knots (you don’t use the two outer threads here).

Underneath the first row of staggered square knots, make another row of 8 square knots.

Below that make again a row of 7 staggered square knots, again not using the 2 outer threads. Between the knots you now make a space of about 2.5 cm, which is exactly the width of most rulers so you can easily make the same space in between.

This is the result. You’re actually doing the same thing the whole time when making this bag: just square knots.

You have already repeated the same steps on the other handle. Now you’re going to make the bag together.
Lay the 2 sides on a table and take the 2 outer free threads from each side.

Put a square knot in the same way.
Now put the two sides together and make a square knot with the other 2 free threads of the 2 sides. From now on it is easiest if you hang the bag. You can easily work in rounds this way.

You now continue in the same way. Always staggered square knots, with 2.5 centimeters between each one.

In total, make 7 rounds of square knots with 2.5 cm spacing. This is the result.

Once you hang the bag to work in rounds, the ruler doesn’t work as conveniently. But since you did the first row using ruler, you can keep that space as a reference 😉 .
Oh yeah, if it’s not exactly that 2.5 cm, of course it’s not a disaster either 😉

Now make 2 more rows of square knots that you knot close together again. In total you will have 3 rows of square knots knotted together. This forms the bottom of the bag and makes sure things don’t fall out 😉 😉 To finish the bag, take 2 rows of square knots from left to right.
To finish the bag, from left to right, take 2 threads from each side and tie a double knot. I couldn’t get a clear picture of this, but luckily it’s self-explanatory when you have the bag in front of you 🙂

Cut the threads (leave a bit for when a knot comes undone) and turn the bag inside out. You now have a nice sturdy bottom.
If you like, you can also just leave the threads hanging as fringe!

And the bag is ready! Super cool huh!
Do you want to make a bigger bag now? Then simply add an even number of threads at the beginning to make it wider, the process remains exactly the same. Is your bag getting longer too? Then also add a piece to the length of the threads, so for example 2,5 or 3 meters.
WE LOVE MACRAMÉ !!

Besides this cute bag, there are countless possibilities for bags with the macramé technique! So search on pinterest for fun ideas like this one with macramé bag or macramé bag as search term and get some inspiration 😉
Be sure to check out our previously posted Macramé Blogs:
– Decorate your terrace with a Macramé flagline
– Go for the Ibiza Boho Style with these beautiful Macramé feathers
– Create an Urban Jungle with this Macramé Plant Pendant
– Create a dreamcatcher for above your bed

See here many more creative macramé patterns!
As always, we are very curious about your ideas, wishes and results. So share them with us, via email, below in the comments or on instagram with #beadsandbasics. We’re looking forward to it 😉
Do you have a specific macramé pattern or idea you’d like to see posted on our awesome Beads & Basics Blog? If so, please share it with us and who knows, there might be such a blog coming soon 😉
Lots of making fun!!!
Love,
Matilde


Anna
op 14 Jul 2021