
Dreamcatchers! Super beautiful and still hip. In this blog we will show you how to make such a beautiful Macramé Dreamcatcher yourself! We used a pretty simple pattern with basic knots so this Macramé Dreamcatcher is easy to make even by beginners 😉 .
There are 1001 variations to dreamcatchers. So search for nice patterns on pinterest or youtube or crochet one!
There are plenty of possibilities, but first this fun macramé pattern!
How to Make a Macramé Dreamcatcher – Beautiful & Simple!

Supplies:
– Macramé yarn (I used Phildar Phil Corde Ecru, but you can also use a different kind of macramé yarn)
– Scissors and punches
– Embroidery hoop of 25 cm
– Yarn that you can pick out to make tassels with
– Wooden beads if needed
How to Make a Macramé Dreamcatcher – Step by Step Description
To begin, cut 16 cords 4 meters long.

Fold in half and make one at a time with a larks head knot to the ring.

Hang the cords down over the ring.

Split the cords in half so you have 16 threads on each side.

Take the outermost cord and pull in under the remaining cords.

Pass the cord under the ring.

And put a double half hitch knot in the middle of the ring.

Then take the outermost cord from the other side, pull it over the cord you just tied, under the ring, and make a double half hitch knot here too.
Keep repeating this from one side to the other, always over the previous cord, always the outer most cord.

Here’s what you get. It looks pretty complicated, but it really isn’t at all 😉 .

Just to be sure, here’s how to make the half hitch knot on the ring. Pull the cord under the ring, then over it and pull the end through the loop that was created (see the picture above). Pull and repeat 1 more time, this is the half hitch knot.

When you have done that with all the cords, this is the result.

An complicated and professional look, while secretly being very easy 😉

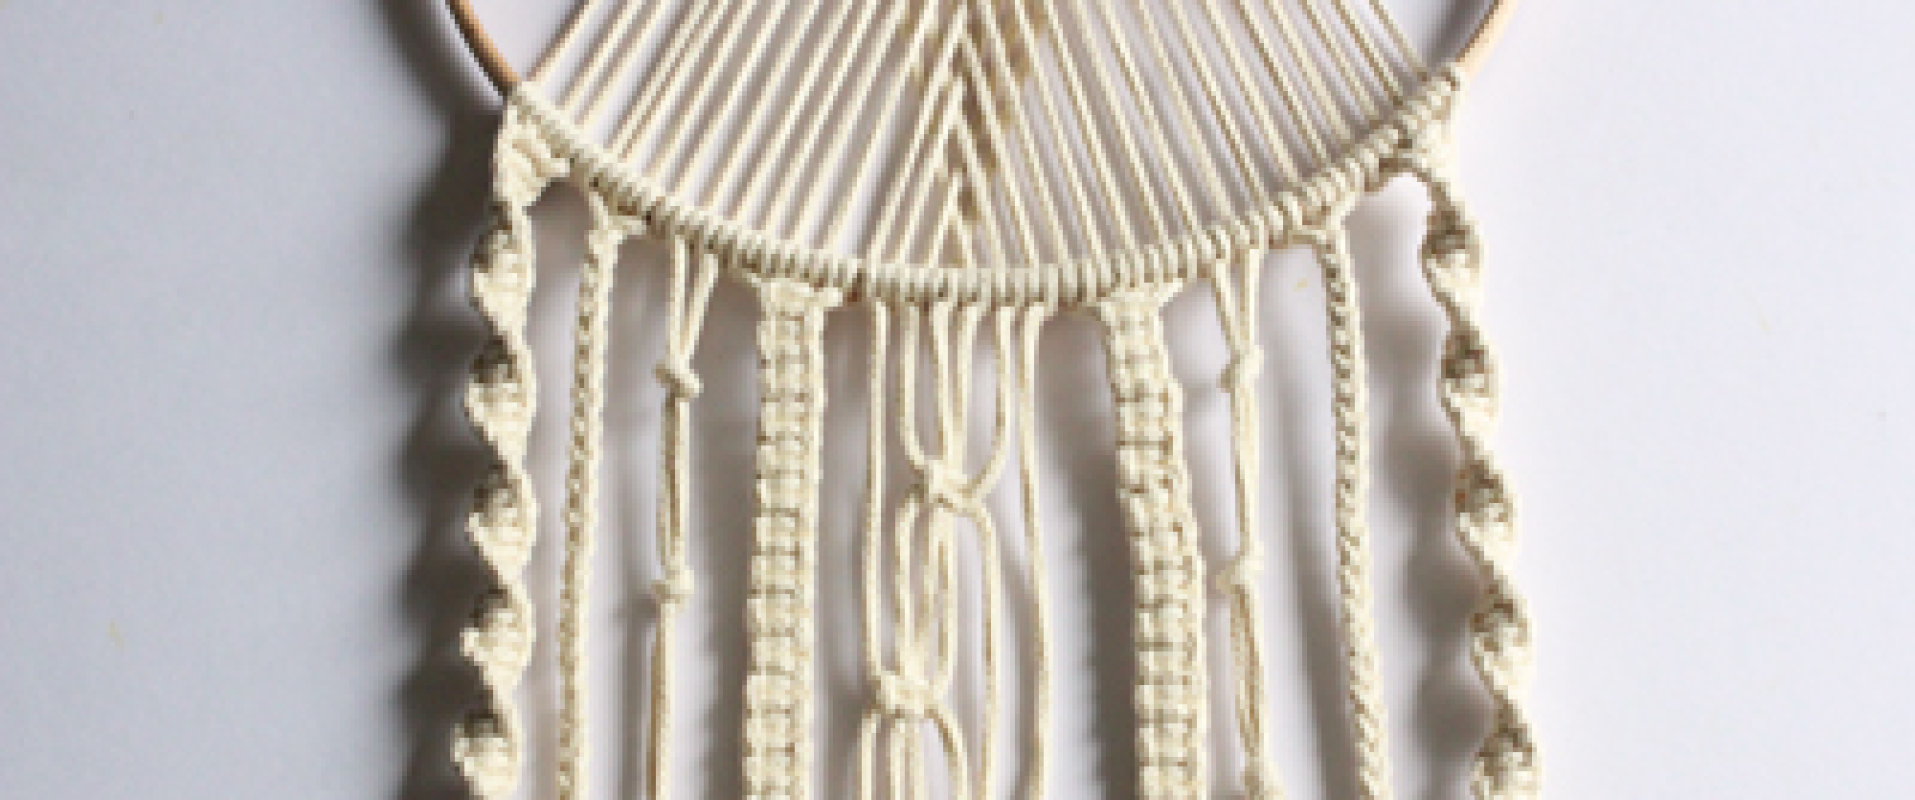
Now you are going to continue working the bottom of the macramé dreamcatcher. Work from the outside in. Take the outer 4 threads and make here a strand of spiral knots.
Repeat the action you see in the picture, actually it’s half a square knot, repeating it over and over so you get a helix shape. I made my strand about 26 cm long, the more inward you make the strands with knots, the longer you make them.
For a detailed explanation of the spiral knot (and also the square knot that I use later) you can check out our Macramé Basic Knots Blog 😉 .

Using the three adjacent cords, make a slightly longer simple braid.

With the again adjacent 2 cords you make regular knots, leaving about 5 centimeters over, also this strand is again slightly longer than the braid.
The adjacent 4 strings are used for square knots, again slightly longer than the knots.

In the middle, once you have made the strands on both sides, you are left with 6 strands. A little from the ring, place a square knot with the middle four strands, then a little below that a square knot with the leftmost outer 4 strands and then a little below that a square knot with the rightmost outer 4 strands. In this way the square knots are staggered. The result you see above 😉. Tie the end in a big knot.

From the other yarn, cut 4 pieces of about 33 centimeters long (this is valid if you have thick yarn like I do, with thinner yarn of course cut more pieces than 4). Fold in half and attach with a gathering knot (here is a link with an explanation of the gathering knot) to the two outer strands of spiral knots and one to the middle strand of staggered square knots. Fluff or comb the threads (depending on the yarn).

Simply cut the strands with the braid and square knots a little below the last knot and optionally add wooden beads to the strands with normal knots.


And Voilá! The dreamcatcher is ready! How exactly you finish the strands (with tassels/knots etc) is of course entirely up to you! For example, you can make the tassels smaller, in a different color or just use beads for finishing. What you do exactly is totally up to you 😉
For example, these feather charms are also super cool to use for the finishing touch 🙂
Also fun: instead of a ring, use a metal moon, star or heart as the base for your dream catcher.


Shop the metal rings in different shapes and sizes here!
Be sure to check out our previously posted Macramé Blogs:
– Decorate your terrace with a Macramé flagline
– Create an Urban Jungle with this Macramé Plant Pendant

Check out many more creative macramé patterns here!

Besides the kind of dreamcatcher I showed in this blog, there are other variations to consider. Like this dreamcatcher/wreath. Not really macramé, but mostly braids/ ribbons/cords and tassels and a ring decorated with pompoms and twigs and leaves. I wanted to show this one because it gives a whole different vibe 😉 .

I used an embroidery hoop in this tutorial, but it also works really well to use gold rings like this for a chic look.
Just within the macramé dreamcatchers there are so many possibilities! So be sure to search for yourself as I said at the beginning of blog 😉 because there are so many fun possibilities!
From classic dreamcatchers to very minimalistic ones, everything is possible 😀
Whatever you do, as always we are super curious about your ideas, wishes and results. So share them with us, via email, below in the comments or on instagram with #beadsandbasics. We’re looking forward to it 😉
Do you have a specific macramé pattern or idea you’d like to see posted on our awesome Beads & Basics Blog? If so, please share it with us and who knows, there might be such a blog coming soon 😉
Lots of making fun!!!
Love,
Matilde