Personally, I am a huge fan of the Macramé technique. It’s easy, it yields super quick results and it always turns out beautiful! Therefore in this blog a DIY Macramé Flagline. You can easily apply this flagline anywhere in your home as decoration. For example on the wall, to a plant pot or basket or in the nursery. A multifunctional decoration piece! And besides that, I think it fits in just about any interior 🙂 .
So don’t wait any longer and get started with this DIY Macramé Flagline. If you have never made anything with Macramé that is no problem! This flagline is so easy that experience is not necessary. Do you want to try something first? Read this blog with basic macramé knots.
DIY Macramé Flagline. Super Fun & Suitable for Beginners

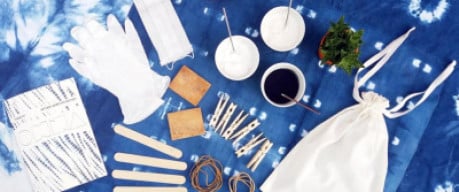
Supplies:
– Macramé yarn (I used ByClaire Chunky Cotton Sand for this DIY. You can also use another brand of yarn)
– A comb to give it a real feathery look
– A good pair of sharp scissors
– Wooden beads 20mm
Work Description DIY Macramé Flag Line

Step 1: To start, think about how long you want to make your flag line and cut a basic thread to that length + a little extra (in the picture the vertical thread). For 1 flag, cut 6 wires with a length of 60 cm. Start in the middle by knotting the 6 threads using the larks head knot.

Step 2: Thread the yarn through the loop. Repeat for each of the 6 threads.

Step 3: This is the result untill now.

Step 4: Now you continue with the square knot. For the first row, that’s a total of 3 square knots, each made with 4 threads.

Step 5: Pass the left yarn over the 2 middle yarns and under the right yarn.

Step 6: Then pass the right yarn under the 2 middle yarns and through the loop over the left yarn. Pull. You are now half way through the first square knot.

Step 7: The second part of the square knot works exactly the other way around. Pass the left yarn over the 2 middle yarns and under the right yarn.

Step 8: Then pass the right yarn under the 2 middle yarns and through the loop over the left yarn. Pull.

Step 9: Repeat steps 5 through 8 two more times to make 3 square knots using the next 2 sets of 4 threads.

Step 10: Now you make 2 square knots. You don’t use the outer 2 yarns on either side, so you have 2 sets of 4 yarns again.

Step 11: In this way you get a triangular shape. Finally you make 1 square knot by again not using the outer 2 threads on both sides. So you make a square knot with the last 4 yarns.

Step 12: This is the result untill now.

Step 13: You will now begin the double half hitch knot. For this, lay the top yarn diagonally over the other yarn.

Step 14: Pass the next yarn over the diagonal yarn.

Step 15: Then pass the yarn under the diagonal yarn. Pull and repeat steps 14 and 15 one more time to make the double half hitch knot. Repeat 4 more times with the subsequent yarn.

Step 16: This is the result untill now.

Step 17: Now make the double half hitch knots on the other side of the flag. Again, lay the top yarn diagonally over the other yarn and start knotting.

Step 18: This is the result untill now.

Step 19: I made a wooden bead on the bottom 4 threads. Cut all the yarns to the same length and comb them out. You will then get this result. Now repeat this for all the little flags you want to make, between each flag, I used a wooden bead. You can of course use other beads for this, but keep in mind that the hole has to be big enough 😉 .

In the end, you’ll have such a beautiful hand-knotted flag line. You can make it as long as you want! Do you want bigger flags? Then use 8, 10 or 12 yarn instead of 6 basic yarn. Build off the number of square knots in the same way and that way you will get a larger flag. For a flag of 8 yarn you can also use a yarn length of 60 centimeters, for a width 10 or 12 you will need more! I think about 100 centimeters 😉
Other Ideas with the Macramé Technique

Our DIY Macramé flag line is multi-purpose in your interior. For example, make it around a basket as you see here!

That marcramé can be more than tapestries these examples show. Like here for example! A macramé tapestry and storage in 1! I’m sure we’ll post a DIY of this soon too 😉 .

And this is probably what we will show you one day: a beautiful Macramé bag! You can either marcramé an entire bag or use an existing bag as a base as was done here.

Another super cool idea: macramé chair seats! Go to the thrift store, get a couple of worn out chairs and make them totally hip by making a seat in them with macramé!

Well I don’t really need to say it again but: Macramé is a really cool and easy technique! You learn it really easy and the result is always beautiful! So go ahead and start working with the macramé technique and soon you’ll be making wall hangings, chairs, bags and of course a lot of flag lines 😉 !
As always we are curious to see your results, so let us know via email or instagram with #beadsandbasics.
Do you have any suggestions or wishes regarding Macramé tutorials? Let us know in the comments below and who knows you’ll see a DIY soon!
Love & a lot of fun creating!
Matilde