
Do you often get compliments on your jewellery designs? Do people wonder how you pull that off? And do you want to make some extra money doing what you love?
If this is the case, giving jewelry workshops might be something for you.
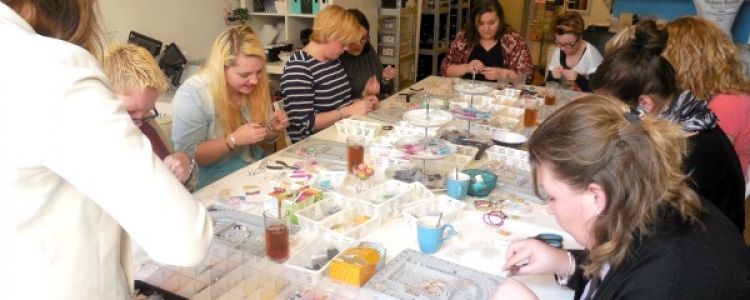
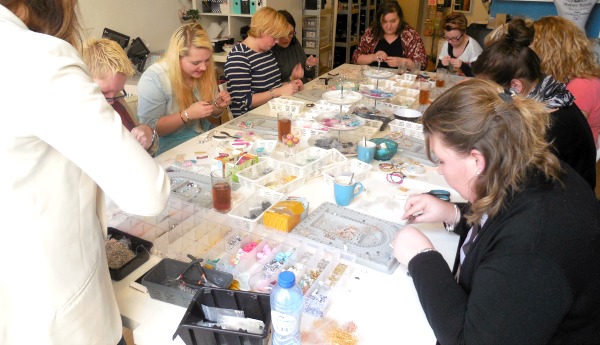
We ourselves organised a few workshops the last couple of years and they were a great succes! These were held at people’s homes, at our office and sometimes even at big brand companies like Vodafone and SNS Bank.
We ended up gaining a lot of experience about planning and running workshops, and we like to share this knowledge with you!
So are you interested in giving workshops (in the future)? Keep reading!
How to give a workshop?
Everyone is capable of giving a workshop, as long as you’re creative and know your craft! Your friends and family might wonder how you make all those fantastic jewellery pieces. They might even be eager to learn how to do it themselves. This would be a great opportunity to try out running a workshop and gather some experience. See if you like it. If you do, you might consider doing this in order to earn some extra money.
Who would want to attend a workshop?
The people that would like to attend your workshop is your target audience. If you’re planning on running the workshop by yourself, think about how many participants you think you’re able to handle. Go with what feels comfortable to you. If you have a friend or acquaintance that can help you, you might be able to manage a larger group.
Fun workshop at Vodafone
Designing jewellery is something that almost every woman is willing to try some time, so your potential clientele is huge! Even the people that are convinced they’re “not creative at all” (which is something we have heard from a lot of participants) usually go home with a cute piece of jewellery that they created themselves.
Kids will enjoy these workshops as well. Keep that in mind next time you have to organise a birthday party or a school activity. We took the effort of brainstorming and making a list of potential participants and events for your workshop:
friends school activity
colleagues company outing
classmates bachelor party
community centre kids party
What to make during the workshop?
Naturally, one of the most important parts of planning the workshop is choosing what you’re going to make. There is an innumerable amount of options, but it’s best to choose something that you know how to do well.
Don’t just plan on ‘making jewellery’. This concept is way too broad and hard to manage when it comes to supplying materials and providing proper explanations and tutorials. Choose one or two designs to work with, and let the participants choose the colours and materials they want to use to create their jewellery.
We selected a top 5 of jewellery designs you can use for your workshop. We have used these ourselves when running workshops and they have all been well received!
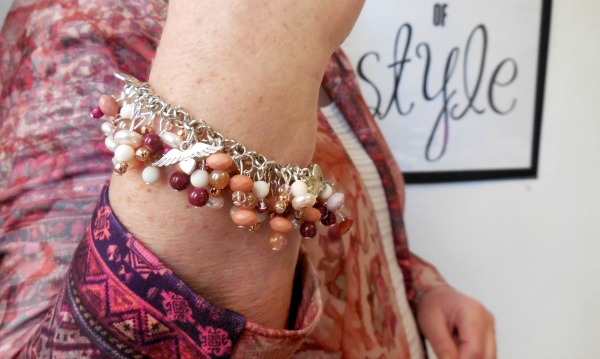
Making a Charm Bracelet
A charm bracelet is perfect for a workshop. When it comes to time-management, this design is perfect. A workshop should last around 2-2,5 hours, which is about the same time as it takes to create this bracelet.
What’s also convenient; this design doesn’t use that many different techniques. The main thing is knowing how to shape the headpin to form an eye and attach these to the chain using jumprings.
This makes it a very suitable design for a beginners workshop. Furthermore, this design doesn’t use a lot of material and the final results are always gorgeous. The design is beautiful and not standard.
A lot of people that had never made jewellery before and tried this design during the workshop were super proud with their creations. Success guaranteed!
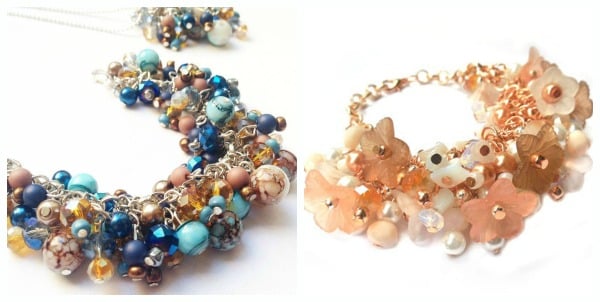
Click here for the necessary materials for the blue and brown charm bracelet
Click here for the necessary materials for the flower charm bracelet
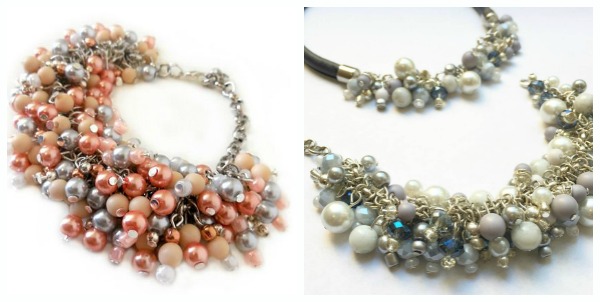
Click here for the necessary materials for the salmon pink charm bracelet
Click here fot the necessary materials for the silver charm bracelet
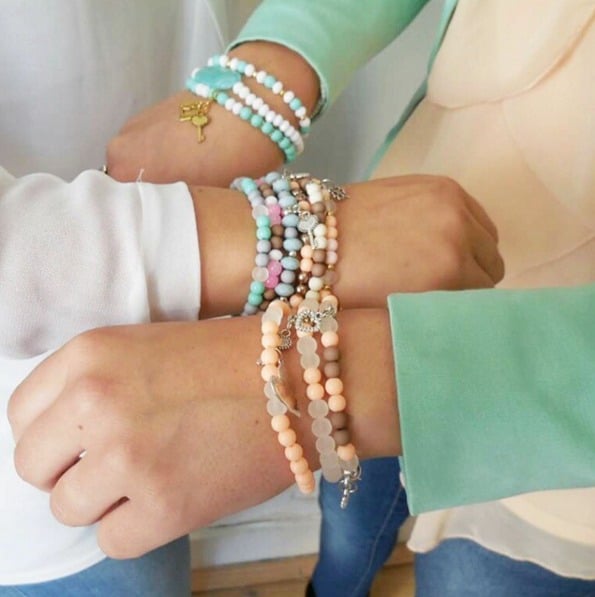
Making a Wrap Bracelet
During the workshops these designs were in great demand. It’s a real statement piece that stands out. Keep in mind that this design involves a lot of steps, which means you’ll have to provide more guidance than for example with an elastic-string bracelet. So it’s best to only choose this design when you attend to a small group of participants.
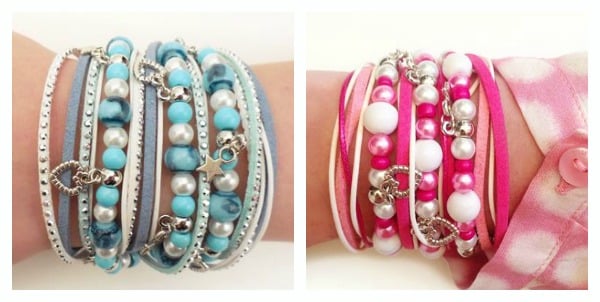
Click here to check out the materials needed for the blue wrap bracelet
Click here to check out the materials needed for the pink wrap bracelet
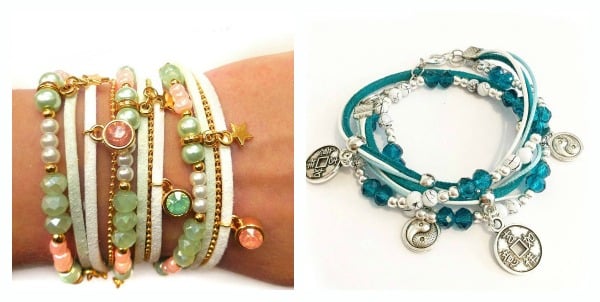
Click here to check out the materials needed for the pastel wrap bracelet
Click here to check out the materials needed for the turquoise wrap bracelet
Video Tutorial – Making a Wrap Bracelet
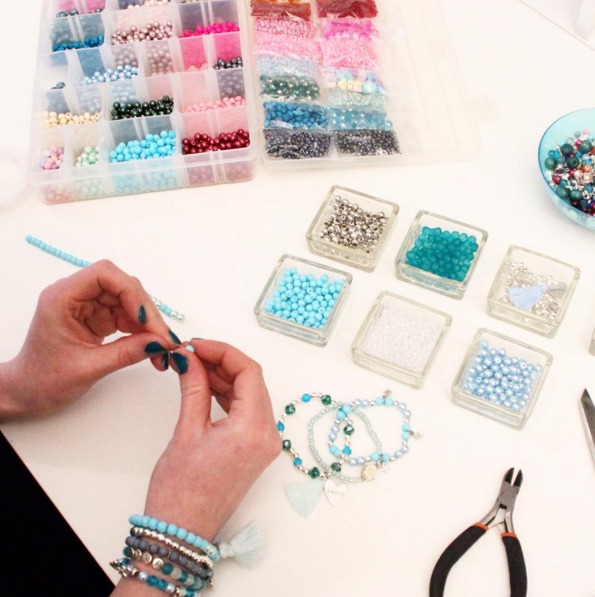
Bracelet using Elastic and Ballchain
If you choose this design for your workshop, your assistance will mostly consist out of helping to choose the right colour combinations. Some participants seem to find this challenging. With these elastic bracelets, you help the participant finishing the jewellery in a neat manner by explaining the method and showing them how to do it. After this you see it they can manage on their own.
You can diversify and combine the elastic bracelet with one made from ballchain. Not only will this create a totally different look; it gives the participants the chance to learn more techniques. You can demonstrate how to work with ballchain and how to finish up your design with a clasp.
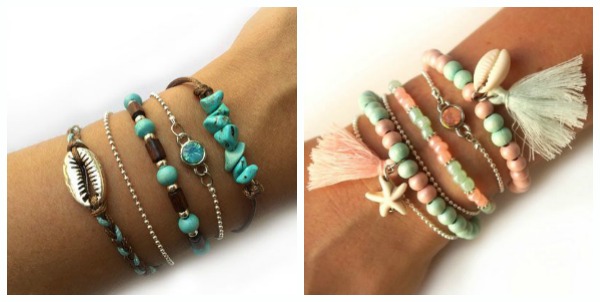
Click here to check out the jewellery parts for the blue combination
Click here to check out the jewellery parts for the salmon pink and mint green combination
Video – How to Make an Elastic Bracelet
Making Wish Bottles
If you’re running a workshop for kids, it can be fun to make wish bottles. This is an easy way to make something unique. You can attach the wish bottles to a necklace using chain, ball chain or suede laces. Apart from filing the bottles with colourful stuff, you can give the designs a little extra by attaching charms or wrap an elastic string with some seed beads on the neck of the bottle. It might also to be fun to design the bottles after a certain theme. Take for example frozen, Ibiza, blue and pink for a baby shower, etc.
Take into consideration that making a wish bottle doesn’t take up that much time. If you’re planning on running a workshop with a duration of 2-2,5 hours, you want to have some other designs prepared as well to fill up the time. For example, a bracelet made with elastic string.

Click here for the materials needed to make the wish bottles
Designing Lucky Angels
Not only do lucky angels look super cute; they’re really fun and easy to make. And you can use them for a lot of things ☺ They can be attach to a necklace from ball chain, to a keychain, or to decorate presents and gift cards. You can even hang them in your Christmas tree, or attach them to a charm bracelet.
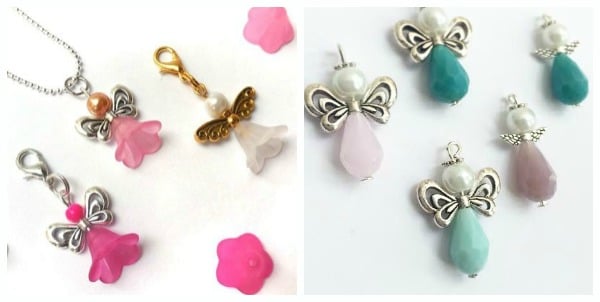
Want to try out these pink flower angels? click here for the necessary materials
All the supplies needed to make lucky angels can be found here
How to make angels out of beads?
The video below shows you a step-by-step tutorial on how to create these angels.
Suede and Waxed Cord Bracelet
The suede and waxed cord bracelet is also a popular choice. They are different from your basic elastic string bracelet and make for a more dynamic look. It is a quite simple piece of jewellery to make, but it does look super stylish.
If you want to use this design for your workshop, you’d have to take into account that the bracelet does need some time to set and dry (due to the use of jewellery glue). This is something to keep in mind regarding time management, but also because most participants will be thrilled to wear their jewellery once they’re done. You have to clearly instruct them to let the bracelets dry and not to touch them for a while, otherwise they might get damaged or fall apart. This can also be the case when making bracelets with elastic string, only these don’t take quite as long to dry.
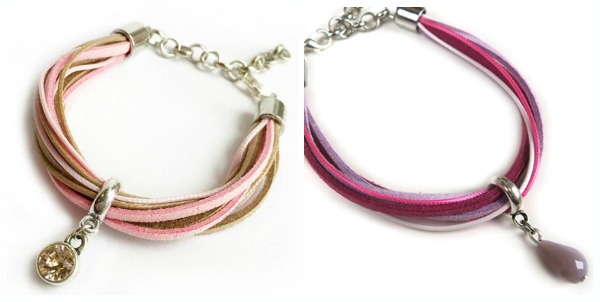
You can find all the materials you need to make this pink and brown bracelet here
Video tutorial for the suede and waxed cord bracelet
Do you see a design you like?
Pick the design you think suits your target audience.
Tip: have a design in mind? You can lay out the basic jewellery parts upfront. This saves a lot of time during the workshop and it makes it easier for the participants.
Keep asking throughout if people need assistance, give them tips for finishing up the jewellery and demonstrate your technique.
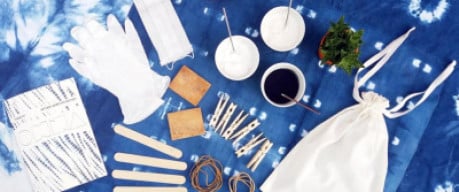
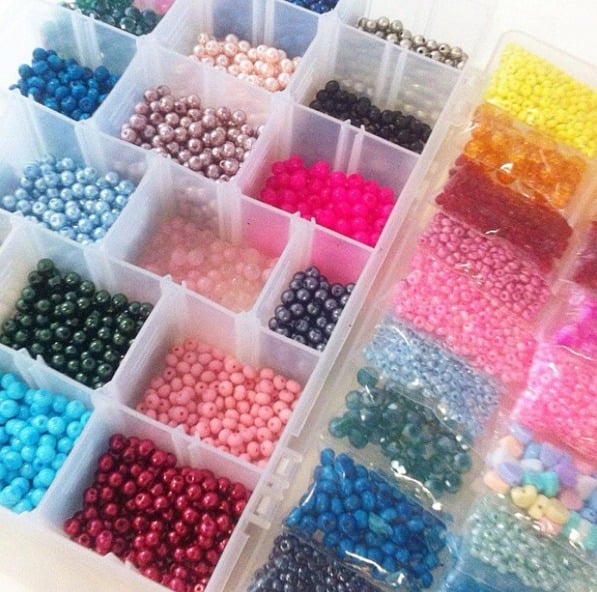
What other supplies do you need?
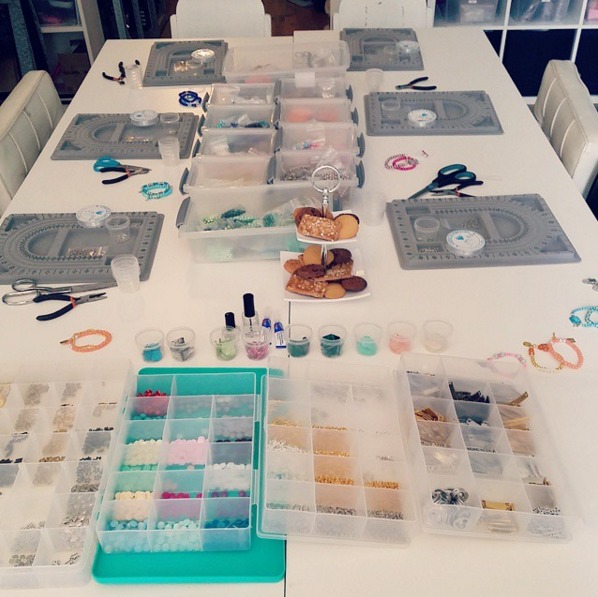
Once you picked a design and you have gathered the basic materials like clasps, crimps and thread, you can start collecting other supplies like tongs and beading boards. You’ll also need a nice looking beads ox to display your beads during the workshop. You can lay out small see-through Dorothy bags with beads on an étagère. This is handy and makes a nice table piece as well.
Do not forget to provide see-through nail polish! You need this to finish elastic string bracelets. Furthermore, you need to provide enough scissors and tongs to go around (if these are necessary to make the design).
TIP: to create a homier feeling, you can set out some cookies and candy on an étagère.
Suitable Workshop Locations
If you’re planning a workshop you need to arrange a suitable location. It is possible to host the workshop at your house, or maybe at a friend’s place if she has more space. This saves you the money you would otherwise spend on renting a location.
But renting a venue is a possibility, and it’s an ideal one if you run a workshop for a large group that doesn’t live nearby. For example with occasions like a bachelor party or company outing. If you’re traveling with public transportation, you can bring all your supplies in a suitcase. If you take the car you can even store them in crates.
If you are hired to give workshops for a certain group of employees, chances are their company can provide a meeting room or an office room. Other people enjoy the idea of you coming to their house and give the workshop there. This gives you a chance to go to places you haven’t been before ☺

Workshop at the cantine of the SNS Bank
Which day should you choose to organise the workshop?
This depends entirely on you target audience. Most people have spare time in the evening and during weekends, but some might have other commitments during these hours as well. If you’re just getting started with running your workshops, you could start by selecting two dates, one during the workweek and one in the weekend. This way you can see when participation of people from your target audience is highest. Of course, it can never hurt to just consult your costumers.
For instance, we asked around on Facebook which day would be most convenient for people. Contradictory to what we thought, most people seem to prefer Sunday. So we decided to try it out and the workshop was fully booked 😉
Keep in mind that people have to plan around this workshop in order to attend. Make sure you announce the date through social media at least 3-4 week up front. This way you have plenty of time to promote the event and this gives the potential customers a chance to save the date.
Planning on running workshops on a regular basis? It might be wise not to announce the dates of all upcoming workshops just yet. A lot of people tend to postpone to register when they know there will be a next time. Shortage has value in marketing; it urges people to purchase the product sooner rather than later. Announcing when there are only a few places left can give them an extra push to register while they can.
TIP: make sure that your social media and site mentions that you also run workshops on request. Every now and often we get request from people and companies to come and run workshops. These are welcoming opportunities for us as well.
How many participants?
When you start with giving workshops, you might want to attend to as many people as possible. Deciding how many participants you want to have depends in part on whether you want to run the workshop on your own or with some else.
Try practicing your workshop skills on friends or colleagues first and see how many participants you can manage on your own. Experience learns us that 5-8 people is a doable amount of participants to handle on your own. When there’s two or you, you’ll be able to assist 10-15 people.
Take into consideration that some designs are easy and the participants may not need a lot of help, whilst more complex designs require more guidance from you.
Make sure the group of people is not too big! Otherwise you run the risk of not being able to assist everybody and some might bot be able to finish their jewellery piece. You would rather have 6 people attending that all have a great time, than 10 people attending that did not finish their jewellery or feel like they did not get enough help with the designs.
How much should you charge for the workshop?
The amount you charge per person should be based on material costs, the amount of hours you put in and whether or not you have to rent a location. Keep in mind that if you own your own company, you have to pay taxes over your earnings. These should be included in the price as well.
Do you organise workshops for bachelor parties or company outings? It might be a good idea to give a discount for groups of 10 or more. This way it becomes more tempting for people to book your workshop. To give you an idea; our workshops cost between 25 and 35 euros per person for a group of 10. Company outings tend to consist of larger groups, which can lower the price per person.
Workshops involving soutache, glassblowing beads or forging silver tend to be a lot more expensive due to the high material costs. Logically, a short workshop for kids making elastic string bracelets is a lot cheaper.
How to promote your workshops?
Have you decided to organise a workshop? Then you want people to attend!
There is a big demand for jewellery workshops so spread the word! You can use all the social media channels available to you. Do you have a facebook, Instagram of twitter account? Make a post that stands out containing all the basic information for the event and include a link to your web-shop or blog.
Don’t own a web-shop? No problem. You can include an email address so people can contact you and register.
If you have a mailing-list, make sure you send everyone an e-mail announcing you started running workshops. Don’t have a mailing-list? You can send your personal contacts an e-mail as well.
You can make the workshops more alluring with a special offer, for example a discount if someone purchases more than one workshops, or a free goodie bag.
You could advert in local newspapers, school papers, or on websites from local communities). This types of organisations might welcome your initiative and place an advert.
It’s always an option to spread flyers. Printing offices often offer discount if you print flyers in large amounts; for just a couple of bucks you can print hundreds of flyers. Pick a day when the sun is out and play the role of postman for one afternoon. This way the locals are aware of the service you now offer.
Perhaps your neighbourhood has some notice-boards where you can put your flyers up. These are often found in supermarkets, community centres and schools. Once, we even spread flyers by attaching them to bikes using elastic bands.
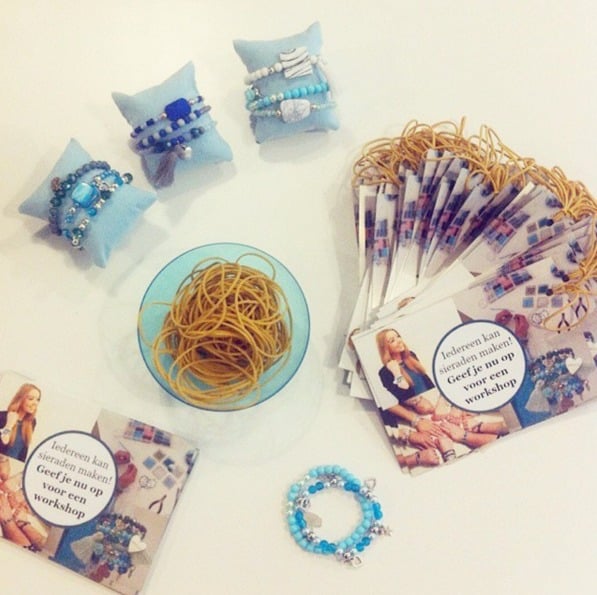
Our flyers with elastic bands
More Tips!
Take initiative by approaching people yourself. Do you want to run workshops for companies? Approach them through LinkedIn or see if you can find a want-ad online. Want to give workshops at schools? Send an e-mails to schools explaining what kind of workshops you run and what arrangements are possible.
And don’t forget about online advertisement-sites.
TIP: When you post something or social media or if you choose to design a flyer, make sure you use a nice picture of the materials people can use during the jewellery-workshop, or perhaps a picture of a design for a bracelet or necklace people can learn to make during the workshop. You might even have some pictures saved of jewellery made in previous workshops that you can use.
With Pickmonkey.com it becomes easy to create collages and add text to your pictures. This is a very useful tool to make flyers!
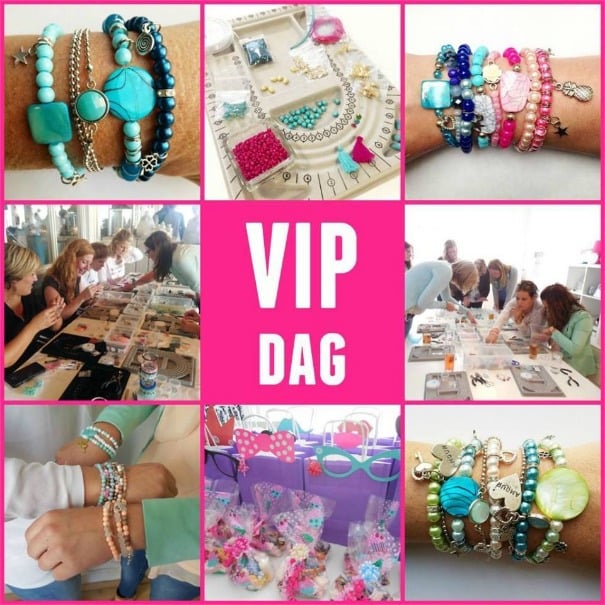
Below you can see the Facebook post we used to promote our workshop. We called this particular workshop ‘V.I.P. Day’ because it concerned a special workshop with free goodie bags.
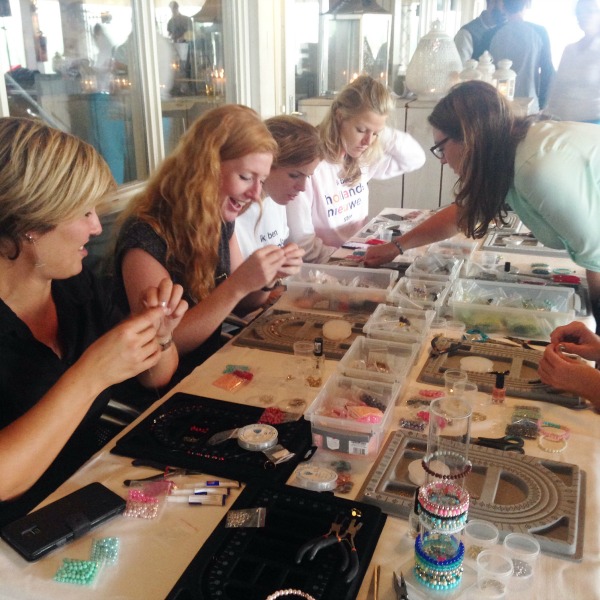
Tips for during the workshop
Now that you gathered a fun group of people that can’t wait to start making jewellery, it is time to begin. What could be better that to share your knowledge and have fun being creative while doing so.
We collected a few tips that you can put in practice when giving your workshop:
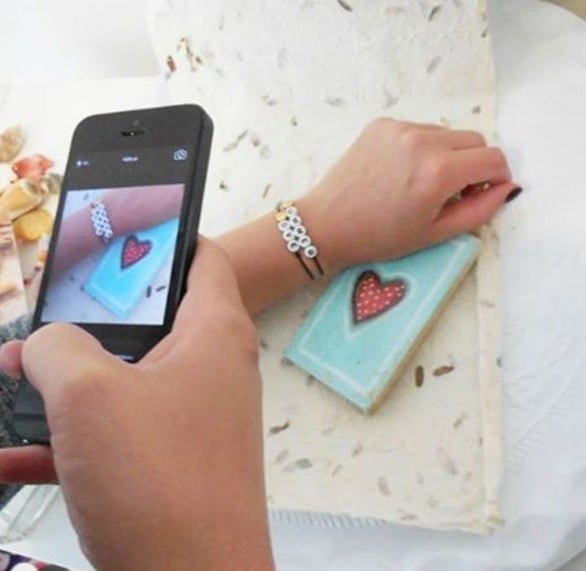
- Begin by giving a short introduction about yourself and what designs you will demonstrate today. Let them pick between two designs or make sure you have picked one upfront. Show pictures of the designs using an Ipad, cell phone, beamer or print some pictures on paper beforehand.
- Ask each person what their favourite colour is to wear; silver, gold or rose-gold. Adjust the basic materials to their choices and lay them out on the table. If people don’t have a clear preference, you can try matching the colours with the clothes they’re wearing.
- Show them different colour-combinations; this gives them inspiration.
- Help with attaching clasps and explain how you do it, so they can do it themselves next time.
- Ask throughout whether people need help.
- Give advice on how they can improve their creations. Perhaps you know what beads can make the design really pop?
- Give tips on measurements and on how long certain jewellery should be. A tape-measure is a must during workshops!
- 30 minutes before the workshop will end, make sure to announce that you’re about to wrap up. Sometimes people are so concentrated on their work that they lose track of time. And you want them to have enough time to finish up their jewellery neatly.
- Last but not least; distribute your business card! If the participants liked your workshop, they might remember you and recommend you to others that could be interested in your workshops.
- If you have some left-over beads from the workshop that you don’t need any more yourself, it might be a nice gesture to give these away to the participants as they leave.
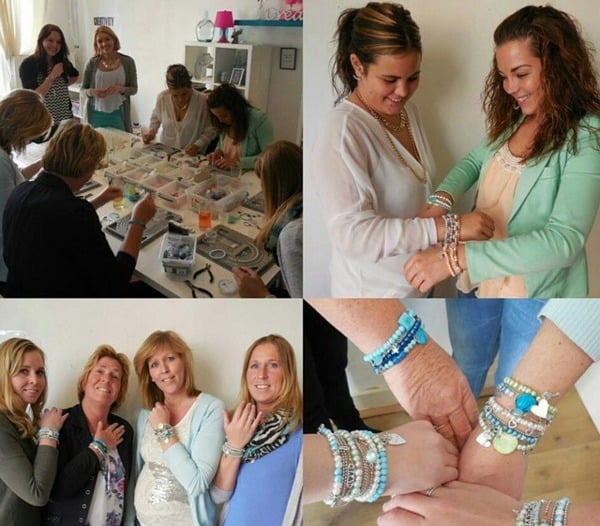
Take pictures during the workshop
We leave you with one more tip: take pictures during the workshop. Post these on all sorts of social media channels to spread the word about the great workshops you run and show what a good time others had at your workshop.
These pictures can be used to promote your services and make new flyers or ads announcing your workshop dates.
Make close-up pictures of the jewellery that people made during your workshop and share these on facebook on Instagram.
Don’t forget to take a group-photo of people attending your workshop. This is a nice memento for those that attended. Plus; they might even post it on social media themselves and refer to you; free promotion is always a good gain.

Get started!
Are you ready and in the mood to now give workshops yourself? Fantastic! Start by picking a nice design and start promoting, it is that simple!
If you already do workshops, feel free to post a discription and link to your site in the comments.
We always love to see what you are doing 🙂
Love, Nathalie and Monique