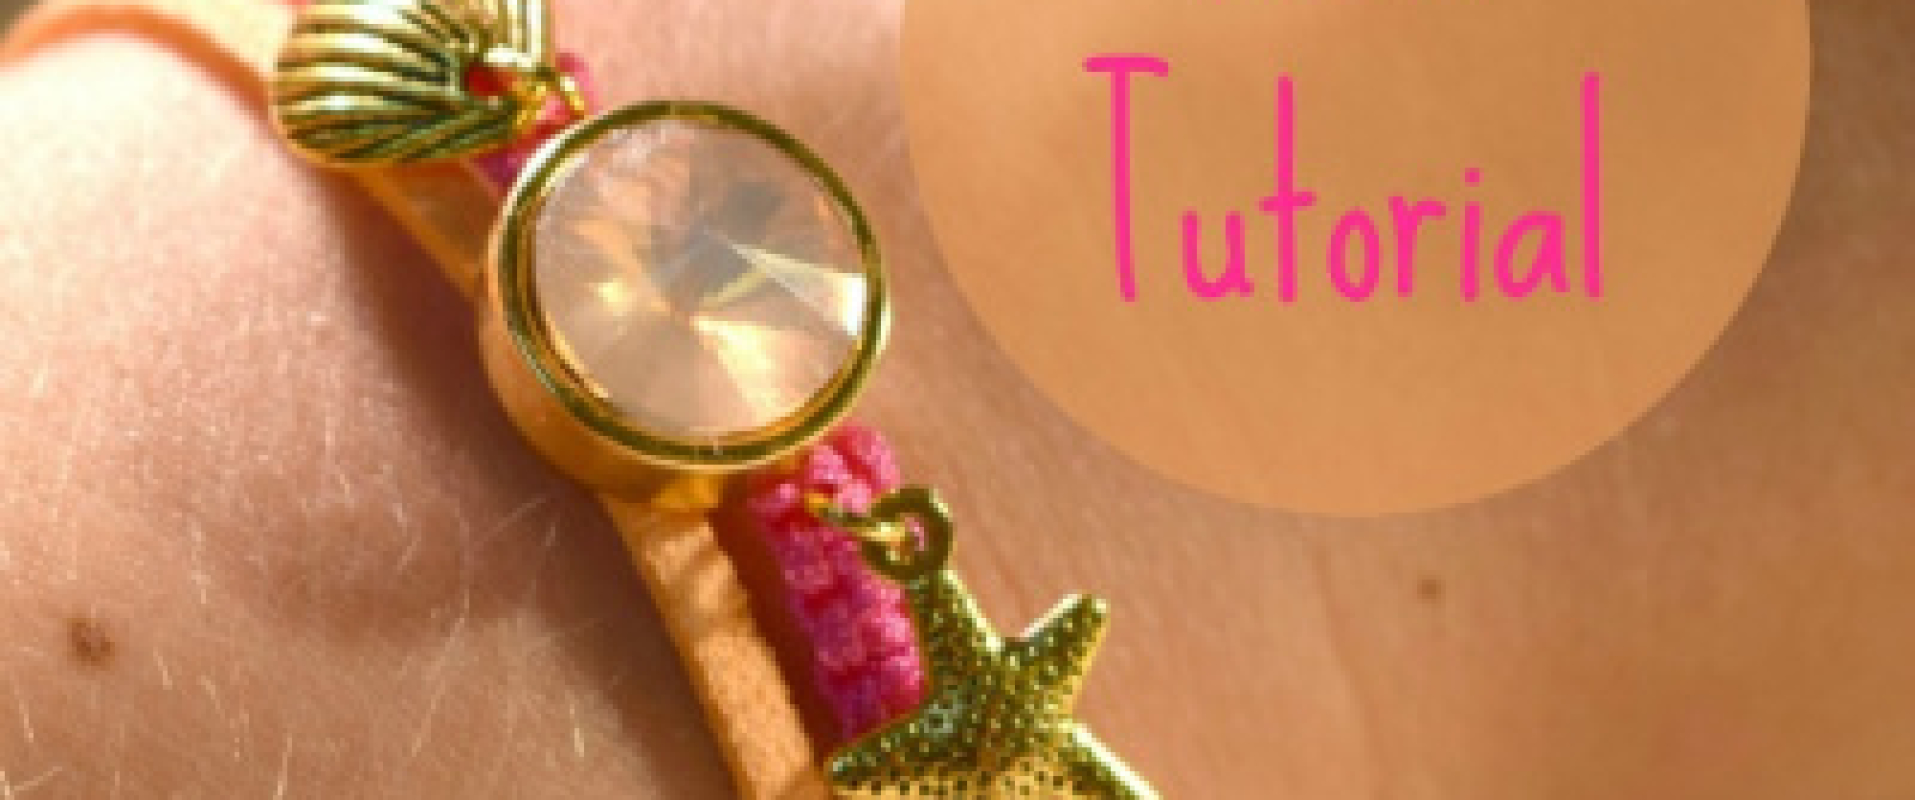

Do you want to make a macramé bracelet yourself? In this tutorial I explain step by step how you can easily make this summer macramé bracelet yourself.
Because of the sliding button you can easily put on and take off this bracelet, so you can quickly take it off when you want to take a dip in the sea or swimming pool!
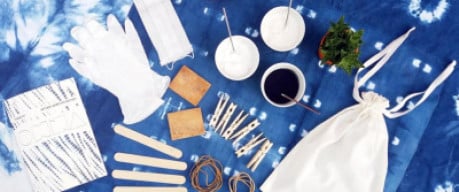
Supplies:

1. Macramé cord and a suede lace
2. Tape
3. Dq slider, 12 mm point stone, gold charms and jump rings
4. Tape measure and lighter
5. Rhinestone glue and scissors
6. Round and flat pliers
Step 1:

1. Cut 2 times 40 cm of cord and carefully burn all the ends.
2. Take both strands and tie a knot at the end.
3. Make another knot 10 cm under the knot of step 2 as shown in the picture.
4. Repeat this also on the other side of the threads
Step 2:

1. Tape the stapled cord to your work surface or, like me, use a clipboard.
2. Cut a 150 cm piece of cord.
3. Make a knot below the knot in the cord by placing the left wire over the 2 middle wires.
4 and 5. Then put the right thread over the left thread and pull the right thread under the middle too 2 threads. Then pull the right thread under the left thread and pull the knot tight.
6. And now make the same knot only from right to left. Now put the right strand on the 2 middle wires. Put the left strand over the right strand and pull it under the middle 2 strands. Then pull the left wire under the right wire and pull the knot tight.
7. Repeat steps 3, 4, 5 and 6 alternately until you reach the other knot.
Step 3:

1. Now turn your knot work over and thread the remaining 2 threads (not the middle one) back through the knot.
2. Cut the remaining thread to half a cm.
3. Burn the cord of half a cm so it can not come loose.
Step 4:

1. Thread the DQ slider onto the macramé piece (you’ll need to push through a bit now and then because of the buttons)
2. Cut a piece of lace of 35 cm and thread the slider on this piece as well.
3. Make a knot in both ends of the lace.
Step 5:

Now we are going to make the sliding knot so that you can easily put on and take off the bracelet.
1. Put the 4 ends next to each other.
2. Make as in step 2 4 knots around it.
3 and 4. And fasten it firmly again as in step 3. (Want to see the step by step video tutorial on how to make a slipknot? Then watch the video tutorial here)
5. And then the base of your bracelet is ready!
Step 6:

1. Make sure the slider is in the center of the macramé piece. Then open a jumpring and then attach it to the macramé piece next to the slider.
2. Hang the charm on the jumpring and then close the jumpring again.
3. Repeat steps 1 and 2 also on the other side of the slider.
4 and 5. Put a drop of rhinestone glue in the slider and spread it with the nozzle of the glue tube. Then place the pointed stone in the slider and if necessary remove the excess glue with a cloth. Let this dry thoroughly for 24 hours so that the pointed stone is secure.

And then your summer macramé bracelet is ready!
In what color combination would you make this bracelet? Let us know in the comments 🙂